The new forums will be named Coin Return (based on the most recent vote)! You can check on the status and timeline of the transition to the new forums here.
The Guiding Principles and New Rules document is now in effect.
I'm a miniature painter in Illinois. I'm looking to expand my business but I'm actually posting this just to get feedback on some of my work...I'll post more as time goes on but you can look at my site which you can find on my profile and here are a few others
Would you mind posting some images of your work directly, rather than just linking to your website? We have a policy around here of generally locking threads that don't have art posted in-line, as a way to curb people from posting just in order to drive traffic to their websites.
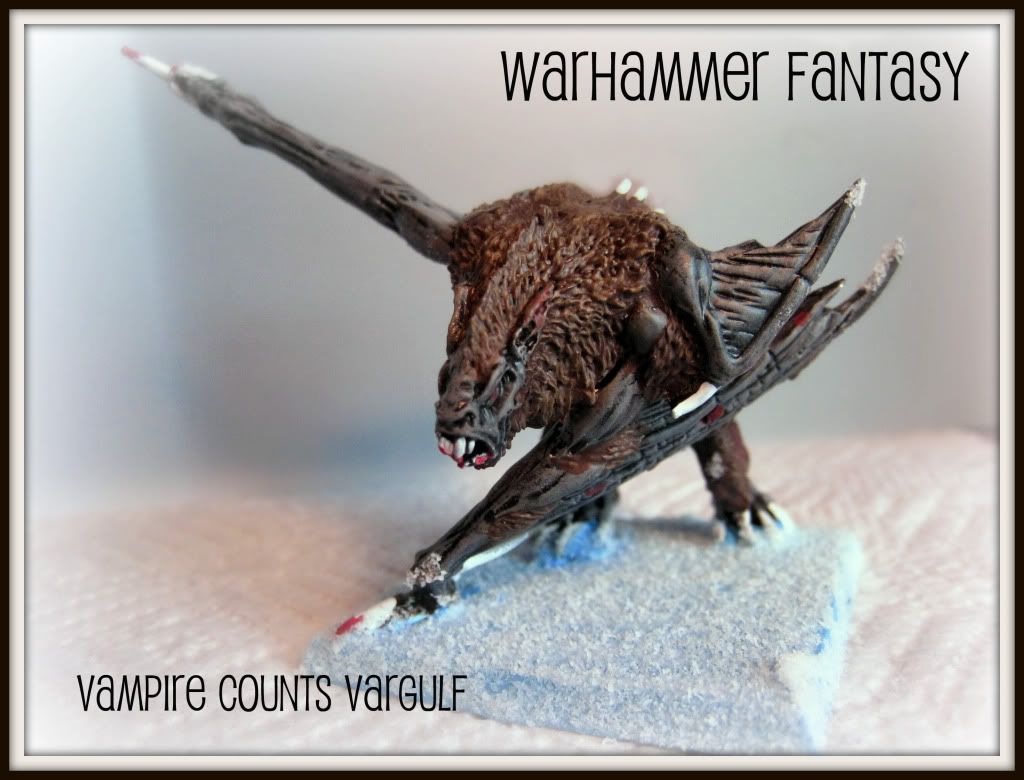
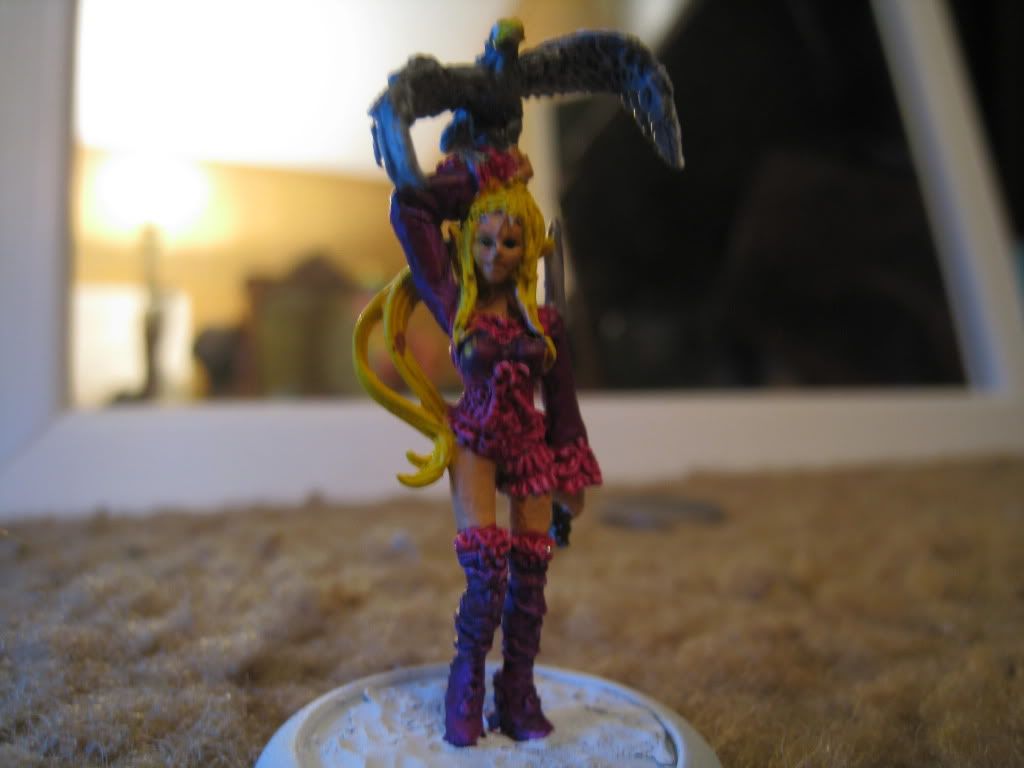
I love the effects on the vampire. The hair looks hairy. And your photography of the models really accentuates the detail. (other than the blonde chick, that one is too blurry to see any detail)
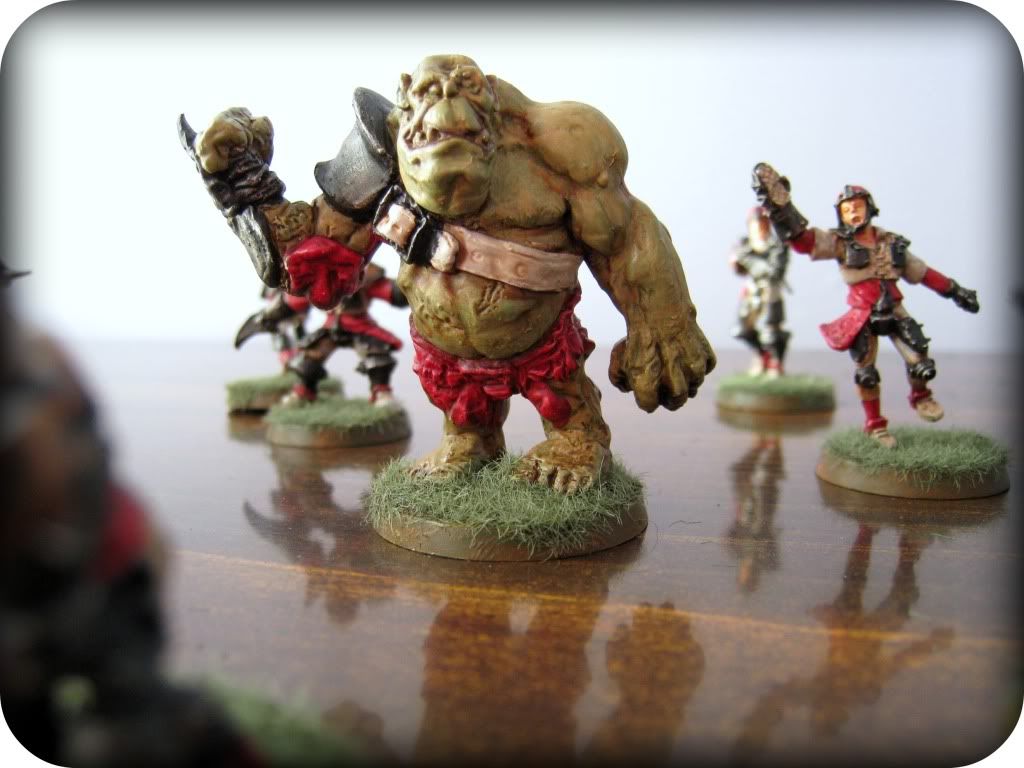
Do you plan on doing the eyes n teeth on that ogre guy? He looks kind of half done (eyes, teeth, belt, scars could be a little fleshier). Do you do basing much?
Also, no offense to Games Workshop, but Privateer Press and Confrontation models just look. WAY. better.m(I pleh Hordes Legion of Everblight)
I like your painting, can't wait to see moar!
Thanks. The blonde chick I had very bad lighting at the time. It was a commission so I can't get a better picture. With the Ogre I was thinking about doing the other detail but I just kind of liked the way it looked the way it was. THough realistically I probably should have done it.
As far as basing I am just learning. THe Vargulf I was experimenting on and the ogre was the first one I really tried on. I hava alot of material to work with now so I'm excited to do more basing but I have to paint first Why do you ask?
My rates are varied depending on how many models, difficulty, and if you want basing. You can check my website at http://paintmyminiatures.blogspot.com/ If you want an idea of it I would say between 35-40 per box (this is based on what a box of non-hero warhammer models) or $20 for a hero type model and I always just go with an extra 5 for basing because it's pretty easy and I'm new with it. I would really need to know exactly what he would want done to be able to give you a good quote though.
As far as basing I am just learning. THe Vargulf I was experimenting on and the ogre was the first one I really tried on. I hava alot of material to work with now so I'm excited to do more basing but I have to paint first Why do you ask?
I was going to recommend cork. A lot of warmachine/hordes players I know, as well as a few of my casters I based use cork. Gives it a very environmenty look to them, instead of glued on texture.
examples
something to think about, it takes longer, but the effects are worth it IMO (especially on larger models)
Very nice, BCakesSteph! I've always thought one day I'll have enough time to paint Warhammer miniatures. For the time being, however, I've only painted WWII planes.
Here are a few of my Skaven minis. I only really have this one regiment done as it takes about 30 hours to do 20 models... I would skip on steps but fuck it, I love having a show piece mini in each and every one of them.
Well, that is a lot more effort than I put into my Skaven. Kudos!
BCakesSteph, this thread might be better suited for the Critical Failures sub forum, which is dedicated to table top gaming. There's a thread specifically about painting minis there. I'm no mod though, so you don't have to listen to anything I say.
Nice Skaven (I forgot how good those new models are. They actually look like rats and not wierd... monkey things!), purple is a severly underrated colour. Goes good with the gold.
Can you post some of your process? I always find it interesting how people get what results with which painting techniques.
I have a buttload of Imperial Guard which I started painting with incredibly complex ww2 german camo patterns. After half a squad or so, I looked over at the other 200 odd troopers and dozen tanks, and have since opted against that.
Now theyve got a nice three colour (blue,green,yellow) scheme that looks like nightvision. Takes a good 15 min to drybrush a model. :B
So kudos to you for sticking to your guns. A fully painted showcase army is something to behold. Especially one as hordey and skaven.
Coincidentally, I'm also a mini painter in Illinois. (Chicago, in fact.) The vargoulf and ogre are pretty nice; the girl is a little blurry to tell.
Since you asked for feedback, I have two bits of constructive criticism.
The first is a bit of advice, which 95% of all miniature painters would benefit from, is to increase the contrast between highlights and shadows. Miniatures are tiny, so the light on a typical miniature tends to be fairly flat. In order to bring out the shape of a miniature, you have to paint in the highlights and shadows by hand. You are obviously aware of this fact, since I can see that you drybrushed your black vargulf with a dark gray and washed your greenish ogre with a slightly darker brown to help bring out the shapes of these miniatures. But making your shadows darker and your highlights lighter will really help your painting.
My second piece of advice is to make your bases more interesting. Right now, your miniatures all appear to be on uniformly flat ground with a uniform covering of grass or snow. Try to add some variety. Even by just gluing down some sand, painting it dark brown, drybrushing with light brown, and adding a few clumps of grass here and there, you will get a much more interesting base. As an example of a way to make a snowy base more interesting, like the one on your vargulf, here's a barbarian I painted recently where I put a rocky outcropping under the snow:
P.S. if anyone wants to see more of my stuff, you can check out my CoolMiniorNot gallery here.
While your feedback is spot on, stuff I've forgotten that I learned over the years, plugging your website in general is frowned upon, even in your own thread, unless you're posting work for critique, and happen to also have a website.
By bad, didn't realize this was frowned upon here.
If althai owns CMON, then he is a very lucky man. It's jsut a gallery of his work, he's not asking for commissions and has already posted some of his work in this thread, so I don't see anything particularly out of order.
To the OP:
We have a whole thread devoted to painting Minis over in CF, which is chock full of excited people who love to paint toy soldiers and talk about painting them. If you want feedback and to discuss techniques, then it's probably your best bet on the PA boards.
Feedback wise, I'm going to agree with althai on both points. All the models need way more in the way of highlighting and contrast. Stark highlights are great, especially if you are working to a time limit (ie comission painting). And yeah, the bases are way too basic. Straight flock or painted sand was ok 20 years ago, but even 10 years ago people had figured out that painted dirt and some static grass looks way better. Look at the Games Workshop Website for examples. Just paint the base with PVA, dip it in sand, wait for it to dry, then seal it with more PVA. Paint Scorched brown, Drybrush Bleached bone, then Glue on clumps of static grass. Done!
I did a similar thing with the bases for my LOTR army, but with a darker gray and dead grass.
Again, as althai has said, it's not hard to make an interesting base. Tanbark makes great rocks, and you can get modelling snow in most hobby shops. This base here, while not as detailed as althai's was punched out in less than 20 minutes total work time.
Having had a look at your gallery on the website (Which I think would benefit from being made a bit more user friendly), I'd describe your work as solid tabletop. You really need to work more on developing higher level techniques. You have a solid base of experience to work from, so the best advice I can give you is to keep trying! If you practice and constantly push yourself you will develop very quickly. Make friends with other painters, bug them for advice and always be willing to try new things! A few years ago I was painting like this:
and
But after 4ish years of practice I'm doing stuff like Non-metallic metals (Not very well though!)
and wet blending with washes:
Some starting tips I will give you are:
Thin your paints more. Looking at some of the pictures, the paint seems to be on a bit thick. Thinning it makes brush control easier and it doesn't clog detail.
Let's look at this Hobbit.
I'll just do a brief crtitique:
1: Watch the lines! There's one spot on that picture alone where you have metallics on the cloak. Painting over mistakes is pretty easy, and neat presentation is essential if you want to be a comission painter.
2: Skin tones. A lot of how you paint skin tones is personal preference. I favour high contrast, the best painter I know favours low contrast. Look at how althai has done his. He has built up the tones using both highlighting and shading. Faces are small areas, so need to show definition. Otherwise they look like a small pink smudge. I'd suggest starting with a darker colour and highlighting your way up to the fresh pink tone, with washes to even out the highlights.
3: The cloak. Cloaks are not the easiest thing to do, but they are great practice for layered highlights! In the picture there, there aren't nearly enough layers and, coming back to what althai said, they need more contrast. Having a highlight colour very similar to base is OK if you are doing more than one highlight. For cloaks I usually do 3-5 layers for a normal figure depending on how much I abuse washes. To paint a cloak, I suggest basecoating with a colour darker than the colour you want the cloak to be, then highlighting up where the desired colour is the mid shade. Don't be afraid to do very stark highlights, they look good at tabletop distance!
In the case of this cloak, I started with a darker green, used washes to create some shading, then highlighted with the initial colour, then highlighted up, until I was satisfied with the colour. I was having fun with that one, so I did maybe 7 or 8 layers including washes. A more talented artist with better understanding of light and shade could probably achieve a similar effect in fewer.
Metallics: These are often neglected. Boltgun metal, badab black done right? Well a bit more effort can make metallics look a lot nicer. Go heavy with washes, then lightly drybrush the base colour back over the top to get the detail. Edge highlighting with lighter metallics also makes them look a lot better. Washes and nicks can also give armour a lot more character. I haven't painted much metallic stuff for a while, but here's some worn armour I did a couple of years ago:
This has been very longwinded, but I hope I've helped! Stop by the CF thread and show us more of your work and have a talk!
Thank you all for the critics. I've actually used some of your advice on my current commission which I will post pictures of once they are done and I have permission from the owner (I like to make sure they are OK with me using pictures of their models just in case) I am working on a Pharaohs team for elfball or elfbowl not really sure what it's called I just know it's a lot like Bloodbowl. Anyways, I tried to put more into the highlights and I feel like it's doing better. He wants very basic bases though with just the static grass so I won't be able to get creative with them. I am going to go some basing on some older models of my boyfriends for some practice though and I'll post some pictures of those when I'm done. Also, I was wondering, for those of you who looked at my website. Is there anything you would change on it? I want to make sure it looks nice so let me know.
Well, I suppose there's a time and place for perfectly flat bases with a perfectly uniform covering of static grass. And that time and place would be when it's supposed to represent a fantasy football field. :P
It doesn't look like anyone's mentioned it yet, but there's a minature painting thread over in the Critical Failures forum, as well as the multiple relevant wargaming related threads.
Well, I suppose there's a time and place for perfectly flat bases with a perfectly uniform covering of static grass. And that time and place would be when it's supposed to represent a fantasy football field. :P
Ha ha, thats exactly what I thought when I saw the ogre picture. "Is that some sort of astroturf? Mybe its bloodbowl"
Posts
Would you mind posting some images of your work directly, rather than just linking to your website? We have a policy around here of generally locking threads that don't have art posted in-line, as a way to curb people from posting just in order to drive traffic to their websites.
Twitter
Do you plan on doing the eyes n teeth on that ogre guy? He looks kind of half done (eyes, teeth, belt, scars could be a little fleshier). Do you do basing much?
Also, no offense to Games Workshop, but Privateer Press and Confrontation models just look. WAY. better.m(I pleh Hordes Legion of Everblight)
I like your painting, can't wait to see moar!
As far as basing I am just learning. THe Vargulf I was experimenting on and the ogre was the first one I really tried on. I hava alot of material to work with now so I'm excited to do more basing but I have to paint first Why do you ask?
Stick Figure Serials Comic Blog
http://stickfigureserials.blogspot.com/
I was going to recommend cork. A lot of warmachine/hordes players I know, as well as a few of my casters I based use cork. Gives it a very environmenty look to them, instead of glued on texture.
examples
something to think about, it takes longer, but the effects are worth it IMO (especially on larger models)
Blogs: Endless Space - galaxy seeds | Diablo 3 duels
I too do miniatures once in a while =D
BCakesSteph, this thread might be better suited for the Critical Failures sub forum, which is dedicated to table top gaming. There's a thread specifically about painting minis there. I'm no mod though, so you don't have to listen to anything I say.
edit: I have those exact same die. LOL
Can you post some of your process? I always find it interesting how people get what results with which painting techniques.
I have a buttload of Imperial Guard which I started painting with incredibly complex ww2 german camo patterns. After half a squad or so, I looked over at the other 200 odd troopers and dozen tanks, and have since opted against that.
Now theyve got a nice three colour (blue,green,yellow) scheme that looks like nightvision. Takes a good 15 min to drybrush a model. :B
So kudos to you for sticking to your guns. A fully painted showcase army is something to behold. Especially one as hordey and skaven.
Since you asked for feedback, I have two bits of constructive criticism.
The first is a bit of advice, which 95% of all miniature painters would benefit from, is to increase the contrast between highlights and shadows. Miniatures are tiny, so the light on a typical miniature tends to be fairly flat. In order to bring out the shape of a miniature, you have to paint in the highlights and shadows by hand. You are obviously aware of this fact, since I can see that you drybrushed your black vargulf with a dark gray and washed your greenish ogre with a slightly darker brown to help bring out the shapes of these miniatures. But making your shadows darker and your highlights lighter will really help your painting.
My second piece of advice is to make your bases more interesting. Right now, your miniatures all appear to be on uniformly flat ground with a uniform covering of grass or snow. Try to add some variety. Even by just gluing down some sand, painting it dark brown, drybrushing with light brown, and adding a few clumps of grass here and there, you will get a much more interesting base. As an example of a way to make a snowy base more interesting, like the one on your vargulf, here's a barbarian I painted recently where I put a rocky outcropping under the snow:
Never be afraid to paint outside the lines!
While your feedback is spot on, stuff I've forgotten that I learned over the years, plugging your website in general is frowned upon, even in your own thread, unless you're posting work for critique, and happen to also have a website.
By bad, didn't realize this was frowned upon here.
Never be afraid to paint outside the lines!
To the OP:
We have a whole thread devoted to painting Minis over in CF, which is chock full of excited people who love to paint toy soldiers and talk about painting them. If you want feedback and to discuss techniques, then it's probably your best bet on the PA boards.
Feedback wise, I'm going to agree with althai on both points. All the models need way more in the way of highlighting and contrast. Stark highlights are great, especially if you are working to a time limit (ie comission painting). And yeah, the bases are way too basic. Straight flock or painted sand was ok 20 years ago, but even 10 years ago people had figured out that painted dirt and some static grass looks way better. Look at the Games Workshop Website for examples. Just paint the base with PVA, dip it in sand, wait for it to dry, then seal it with more PVA. Paint Scorched brown, Drybrush Bleached bone, then Glue on clumps of static grass. Done!
I did a similar thing with the bases for my LOTR army, but with a darker gray and dead grass.
Again, as althai has said, it's not hard to make an interesting base. Tanbark makes great rocks, and you can get modelling snow in most hobby shops. This base here, while not as detailed as althai's was punched out in less than 20 minutes total work time.
Having had a look at your gallery on the website (Which I think would benefit from being made a bit more user friendly), I'd describe your work as solid tabletop. You really need to work more on developing higher level techniques. You have a solid base of experience to work from, so the best advice I can give you is to keep trying! If you practice and constantly push yourself you will develop very quickly. Make friends with other painters, bug them for advice and always be willing to try new things! A few years ago I was painting like this:
and
But after 4ish years of practice I'm doing stuff like Non-metallic metals (Not very well though!)
and wet blending with washes:
Some starting tips I will give you are:
Thin your paints more. Looking at some of the pictures, the paint seems to be on a bit thick. Thinning it makes brush control easier and it doesn't clog detail.
Let's look at this Hobbit.
I'll just do a brief crtitique:
1: Watch the lines! There's one spot on that picture alone where you have metallics on the cloak. Painting over mistakes is pretty easy, and neat presentation is essential if you want to be a comission painter.
2: Skin tones. A lot of how you paint skin tones is personal preference. I favour high contrast, the best painter I know favours low contrast. Look at how althai has done his. He has built up the tones using both highlighting and shading. Faces are small areas, so need to show definition. Otherwise they look like a small pink smudge. I'd suggest starting with a darker colour and highlighting your way up to the fresh pink tone, with washes to even out the highlights.
3: The cloak. Cloaks are not the easiest thing to do, but they are great practice for layered highlights! In the picture there, there aren't nearly enough layers and, coming back to what althai said, they need more contrast. Having a highlight colour very similar to base is OK if you are doing more than one highlight. For cloaks I usually do 3-5 layers for a normal figure depending on how much I abuse washes. To paint a cloak, I suggest basecoating with a colour darker than the colour you want the cloak to be, then highlighting up where the desired colour is the mid shade. Don't be afraid to do very stark highlights, they look good at tabletop distance!
In the case of this cloak, I started with a darker green, used washes to create some shading, then highlighted with the initial colour, then highlighted up, until I was satisfied with the colour. I was having fun with that one, so I did maybe 7 or 8 layers including washes. A more talented artist with better understanding of light and shade could probably achieve a similar effect in fewer.
Metallics: These are often neglected. Boltgun metal, badab black done right? Well a bit more effort can make metallics look a lot nicer. Go heavy with washes, then lightly drybrush the base colour back over the top to get the detail. Edge highlighting with lighter metallics also makes them look a lot better. Washes and nicks can also give armour a lot more character. I haven't painted much metallic stuff for a while, but here's some worn armour I did a couple of years ago:
This has been very longwinded, but I hope I've helped! Stop by the CF thread and show us more of your work and have a talk!
Never be afraid to paint outside the lines!
Ha ha, thats exactly what I thought when I saw the ogre picture. "Is that some sort of astroturf? Mybe its bloodbowl"
http://4.bp.blogspot.com/-N6EcVFVblew/TWYG5tty9tI/AAAAAAAAACs/vUav4l1HreM/s1600/IMG_4017.JPG
http://3.bp.blogspot.com/-Dh2fT44qr4Q/TWYG6Ma0LmI/AAAAAAAAACw/j8cqAe3KYGM/s1600/IMG_4018.JPG
http://3.bp.blogspot.com/-g2a2UwnZ5FM/TWYG6uY_53I/AAAAAAAAAC0/AK04YWt7YRk/s1600/IMG_4021.JPG
http://2.bp.blogspot.com/-2NrrK7faLOY/TWYG7C3Zv8I/AAAAAAAAAC4/KQ6zQ2Vxmr8/s1600/IMG_4022.JPG
http://4.bp.blogspot.com/-LFQo7GkGd_8/TWYG7mlOv5I/AAAAAAAAAC8/W-efP0zKGBY/s1600/IMG_4024.JPG
http://4.bp.blogspot.com/-m6LXMuCKVv4/TWYG8el4W_I/AAAAAAAAADA/A-3Y_HsP4UA/s1600/IMG_4026.JPG
http://1.bp.blogspot.com/-ju5xenq7f7o/TWYG838_jZI/AAAAAAAAADE/l9LXLqVKcH4/s1600/IMG_4030.JPG
http://2.bp.blogspot.com/-wglcGYyW_a4/TWYG9fAnX4I/AAAAAAAAADI/5Tkh92Tuhn4/s1600/IMG_4035.JPG
I did two different things on the painting of the alligators. I'm not sure which I like best.